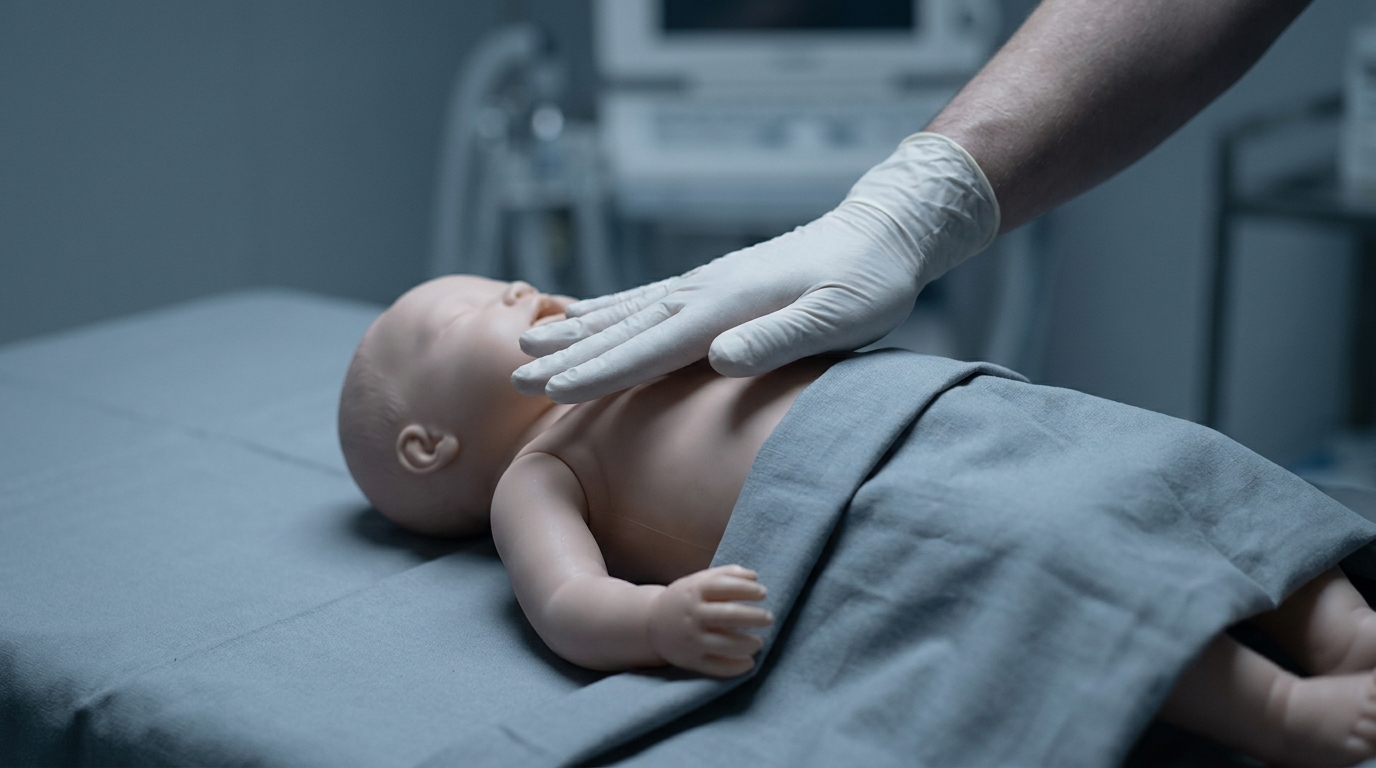
Airway Obstruction in Infants: Back Blows and Chest Thrusts
Detailed lay-rescuer guide for choking emergencies in babies under 1 year: positioning, blow technique, alternating measures, and when to call emergency services.

Author: Dr. med. univ. Daniel Pehböck, DESA
Specialist in Anesthesiology and Intensive Care Medicine, AHA-certified ACLS/PALS Instructor, Course Director Simulation Tirol
Reading time approx. 10 min
Hardly any emergency triggers as much fear as the moment a baby suddenly can't breathe. The face turns red or blue, the child can no longer cry, and you – as a parent, grandparent, or caregiver – are in shock. The good news: with a few clearly structured maneuvers, you can save a life in this situation. This article explains step by step how to recognize an airway obstruction in an infant under one year and how to resolve it with back blows and chest thrusts – no specialized knowledge required, no special equipment, just your hands.
Why Babies Are Especially at Risk
Infants explore the world with their mouths. Everything they can grab gets put in there – small toy parts, pieces of food, buttons, coins. At the same time, their airways are tiny: a baby's trachea is roughly the diameter of a drinking straw. Even a small piece of carrot, a grape, or a peanut can completely block this narrow passage.
On top of that, babies cannot use their cough reflex as effectively as older children or adults. Their muscles are weaker, and the force of their cough is less powerful. What an adult would simply cough back up on their own gets stuck in an infant.
Common Triggers
- Foods: Grapes, nuts, carrot pieces, apple pieces, popcorn, bread, round slices of sausage
- Small objects: Coins, button batteries, small toy parts, beads, pen caps
- Vomit or milk that enters the airways
How to Recognize an Airway Obstruction
Not every cough means an emergency. It's important to distinguish between a mild (partial) and a severe (complete) obstruction, because your response depends on it.
Mild Obstruction – the Baby Can Still Partially Breathe
- The baby is coughing forcefully and audibly
- It can still cry or make sounds
- It breathes in between coughs, even if it sounds wheezy or noisy
- The face may be flushed
What you should do: Let the baby cough! The body's own cough reflex is the most effective mechanism for dislodging a foreign body. Hold the child in a position where it is slightly leaning forward and watch closely. Do not blindly reach into the mouth – you could push the object further in. With a mild obstruction, do not slap the back as long as the baby is coughing on its own.
Severe Obstruction – the Baby Can No Longer Breathe
- The baby can no longer cough or coughs only silently, without force
- It can no longer cry or scream
- There are no breath sounds or only a faint, high-pitched wheeze
- The face turns pale, bluish, or gray
- The baby becomes increasingly limp and less responsive
This is a life-threatening emergency. You must act immediately.
The Rescue Chain: How to Proceed
Before you learn the individual maneuvers, here is an overview of the entire sequence:
- Recognize that a severe obstruction is present
- Call for help – a second person should call emergency services (144 in Austria, 112 Europe-wide)
- Deliver 5 back blows
- Deliver 5 chest thrusts
- Alternate between back blows and chest thrusts until the foreign body comes out, the baby starts coughing or crying, or professional help arrives
- If the baby becomes unconscious: immediately begin resuscitation (chest compressions and rescue breaths)
When Exactly to Call Emergency Services?
- If a second person is present: They should call emergency services immediately (144 or 112) while you begin back blows and chest thrusts. Clearly state on the phone: "My baby is choking, it can't breathe!" The dispatcher will give further instructions.
- If you are alone: First begin with back blows and chest thrusts. Perform about five cycles (i.e., five back blows and five chest thrusts each time) before you interrupt to call emergency services. Every second counts – and your maneuvers may dislodge the foreign body before the ambulance is even dispatched. Use the speakerphone function on your phone so you can continue acting while you speak.
Back Blows: The First Measure
Back blows use a combination of gravity and impact to dislodge the foreign body from the airways. The technique for infants differs significantly from that for older children or adults.
Step-by-Step Instructions
1. Positioning on your forearm:
Sit down or stand in a stable position. Place the baby face down on your forearm. The baby's head should point downward – gravity should help move the foreign body toward the mouth. Rest your forearm on your thigh for stability so the baby cannot fall.
2. Secure the head:
Support the baby's head and jaw with your hand. Grasp the lower jaw with your thumb and fingers without pressing on the throat. Your fingers rest on the sides of the jaw, not on the throat. The head must be lower than the torso.
3. Blow technique:
Using the heel of your free hand, deliver 5 firm blows between the baby's shoulder blades. "Firm" means: noticeably harder than patting – you need to create an impact that dislodges the foreign body. But of course measured appropriately – this is an infant. Each blow should be individual and deliberate, not rapid drumming.
Important:
- Strike between the shoulder blades, not on the back of the head or the lower back
- Use the heel of your hand, not the flat of your hand or your fist
- After each blow, check whether the foreign body is visible in the mouth
- If you can see something in the mouth that you can grasp, carefully remove it with a finger sweep. But never blindly poke around in the mouth!
Common Mistakes with Back Blows
- Striking too gently: Out of fear of hurting the baby, many parents pat far too softly. The blows must be forceful enough to create an impact. A baby that can't breathe needs your decisiveness.
- Head not low enough: If the head is at the same level as the torso, gravity cannot help. The head must be clearly lower.
- Striking the neck or back of the head: This is dangerous and ineffective. Always aim between the shoulder blades.
Chest Thrusts: The Second Measure
If the foreign body has not come out after five back blows, immediately switch to chest thrusts. This compresses the chest, creating an artificial cough – a pressure increase in the airways that should push the foreign body upward.
Step-by-Step Instructions
1. Turn the baby over:
Turn the baby onto its back. Place it on your other forearm, again with the head pointing downward. Support the back of the head with your hand. Alternatively, you can place the baby on a firm surface (e.g., your thigh), with the head lower than the torso.
2. Find the compression point:
The compression point is on the breastbone, approximately in the center of the chest. Imagine a line between the two nipples – the compression point is just below this, on the lower third of the breastbone. Place two fingertips (index and middle finger) on this point.
3. Perform compressions:
Press down 5 times firmly and sharply. Each compression should depress the chest approximately 4 centimeters – that's roughly one-third of the chest diameter. Press deliberately and individually, not rapidly in succession. Between compressions, let the chest fully recoil, but don't completely remove your fingers.
Important:
- Use only two fingers, not your whole hand
- Press on the breastbone, not on the ribs, the abdomen, or the lower end of the breastbone (the xiphoid process)
- The compressions are slower and more deliberate than during chest compressions for CPR – the goal here is not circulatory support but dislodging the foreign body
- After the 5 compressions, check the mouth: Is the foreign body visible?
The Difference from CPR Chest Compressions
Chest thrusts for foreign body removal and chest compressions during resuscitation look similar but have a different goal and a different rhythm:
- Foreign body removal: 5 individual, firm, somewhat slower compressions with the goal of generating a pressure surge in the airways
- CPR chest compressions: Rapid, regular compressions (approximately 100–120 per minute) with the goal of pumping blood through the body
The Alternation: 5 and 5
After the 5 chest thrusts, turn the baby back onto its stomach and deliver another 5 back blows. Then turn over again and perform 5 chest thrusts. Continue this alternation until:
- The foreign body comes out – you see it in the mouth or it falls out
- The baby starts coughing, crying, or breathing again
- The baby becomes unconscious – then immediately switch to resuscitation
- Professional help arrives
Briefly check the baby's mouth at each changeover. If you see the foreign body, carefully remove it with a finger sweep. But never blindly poke around in the mouth – this can push the object further in.
What to Do If the Baby Becomes Unconscious?
If the baby goes limp, stops responding, and stops breathing, cardiac arrest has occurred. The measures now change:
- Place the baby on a firm, flat surface (table, floor)
- Call emergency services if not already done (144 or 112)
- Inspect the mouth: If you see the foreign body, remove it
- Begin resuscitation: 15 chest compressions, then 2 rescue breaths (mouth-to-mouth-and-nose for infants). You should learn and regularly practice the exact sequence of infant resuscitation separately.
Very important: Chest compressions and rescue breaths can also dislodge the foreign body. Don't give up.
Abdominal Thrusts (Heimlich Maneuver) for Infants? No!
You may have heard of the so-called Heimlich maneuver – where upper abdominal compressions are performed to dislodge a foreign body. Abdominal thrusts are not recommended for infants under one year! The internal organs – especially the liver – are relatively unprotected in babies and can be injured by abdominal compressions. That is why only back blows and chest thrusts are used for babies. Abdominal thrusts are only an option for children from approximately one year of age and for adults.
After the Emergency: What You Should Keep in Mind
Even if the foreign body was successfully removed and the baby is breathing and crying normally again, you should keep the following points in mind:
- Medical examination: Always have the baby examined by a doctor afterward, even if it seems to be fine. Back blows and chest thrusts may have caused injuries (bruised ribs, minor internal injuries). Additionally, foreign body fragments may still be present in the airways.
- Observation: In the hours after the incident, watch for unusual breathing sounds, increased coughing, fever, refusal to feed, or restlessness. All of these can be signs of remaining foreign body fragments or injuries.
- Your own processing: A choking emergency with your own child is a traumatic experience. Talk about it – with your partner, with friends, with the pediatrician. It is completely normal to experience anxiety, guilt, or sleep disturbances afterward. Get support if you need it.
Prevention Is Better Than Rescue
The best rescue is one that never needs to happen. A few simple measures significantly reduce the choking risk for babies:
- Prepare food age-appropriately: Quarter grapes lengthwise, cut sausages lengthwise (never into round slices!), avoid nuts and hard foods in the first year of life, cook meat and vegetables until soft and cut into small pieces
- Keep small objects out of reach: Coins, buttons, button batteries, toys with small parts, marbles, balloons – anything that fits through an empty toilet paper roll is potentially dangerous
- Always supervise during meals: Never leave a baby unsupervised while eating, even with age-appropriate food
- Don't feed while lying down: Babies should sit upright or slightly elevated while eating
- Involve older siblings: Explain to older children that they must not give the baby small objects or unsuitable foods
Summary: The Algorithm at a Glance
Here is the entire sequence once more for quick reference:
- Baby is no longer coughing, can no longer cry → severe obstruction recognized
- Second person calls 144 or 112
- Baby face down on your forearm, head lower than torso → 5 firm back blows between the shoulder blades
- Turn baby onto its back, head lower → 5 chest thrusts with two fingers on the breastbone
- Check the mouth – foreign body visible? Carefully remove
- Continue alternating (5 back blows – 5 chest thrusts) until the foreign body is out or the baby coughs/cries
- Baby becomes unconscious → start resuscitation (15 chest compressions, 2 rescue breaths)
- Always have the baby examined by a doctor afterward
Practical Training
Reading an article is a good first step – but in an emergency, muscle memory is what counts. The correct positioning of the baby on your forearm, the force of the back blows, the exact compression point for chest thrusts: all of this can only truly be internalized by practicing on a realistic training manikin under professional guidance. In the baby resuscitation course from Simulation Tirol, you practice exactly these maneuvers until they become second nature – so that in a real emergency, you don't have to think, you just act.
Want to practice this hands-on?
In our Baby-Reanimationskurs you practice this topic hands-on with high-tech simulators and experienced instructors.
More Articles
Respiratory Distress Syndrome in Newborns: Causes and Initial Management
Transient tachypnea, meconium aspiration, and surfactant deficiency – how healthcare professionals and parents can distinguish the most common causes of neonatal respiratory distress and which immediate measures can be lifesaving.
Baby Not Breathing: Infant CPR for Laypeople
A clear, easy-to-understand guide to cardiopulmonary resuscitation (CPR) for babies under one year of age. This article explains how to check breathing, perform rescue breaths, and give chest compressions with the correct hand position – specifically designed for parents and grandparents with no medical background.
Baby Choking: First Aid Step by Step
What should you do when an infant chokes on food or small objects? This article explains back blows and chest thrusts for babies in clear, easy-to-understand language for parents and caregivers – with step-by-step instructions and guidance on when to call emergency services.